Rodrigo's personal site
Rodrigo/Gabriel/Twitch | EE & Programming
One morning, I came across a really cool project by Tzarc, the Ghoul. I loved the fact there was a screen, and fitting the small formfactor that I love in keyboards, I thought it would be a very nice keyboard to use. However, the Ghoul is a bit too small for me. Not having done any PCB design before I thought it would be a good project to try before starting my Electronic Engineering Course at University.
Over the next few days I did research into implementing an RP2040 into circuits, and tried ai03's keyboard design guide. Satisfied with what I had learnt in the guide, and impatient to replace my ageing JJ40, I started work on Lobster 40
I started with designing the matrix, which went very well, which was no surprise as I expected that implementing the RP2040 in full would be the hardest part, and I was right.
Thankfully there are plenty of guides available with information on how one goes about adding the RP2040 to their project, along with the documentation I was able to figure out what components are required (think decoupling capacitors, crystal oscillator, flash)
Implementing the RP2040 wasn't exactly easy, it took a while, and routing everything isn't exactly the easiest for someone inexperienced like me. I was determined to have a custom PCB and so with some help from the lovely MBUK Discord <3 I was able to get the core design down, all that was left was the display.
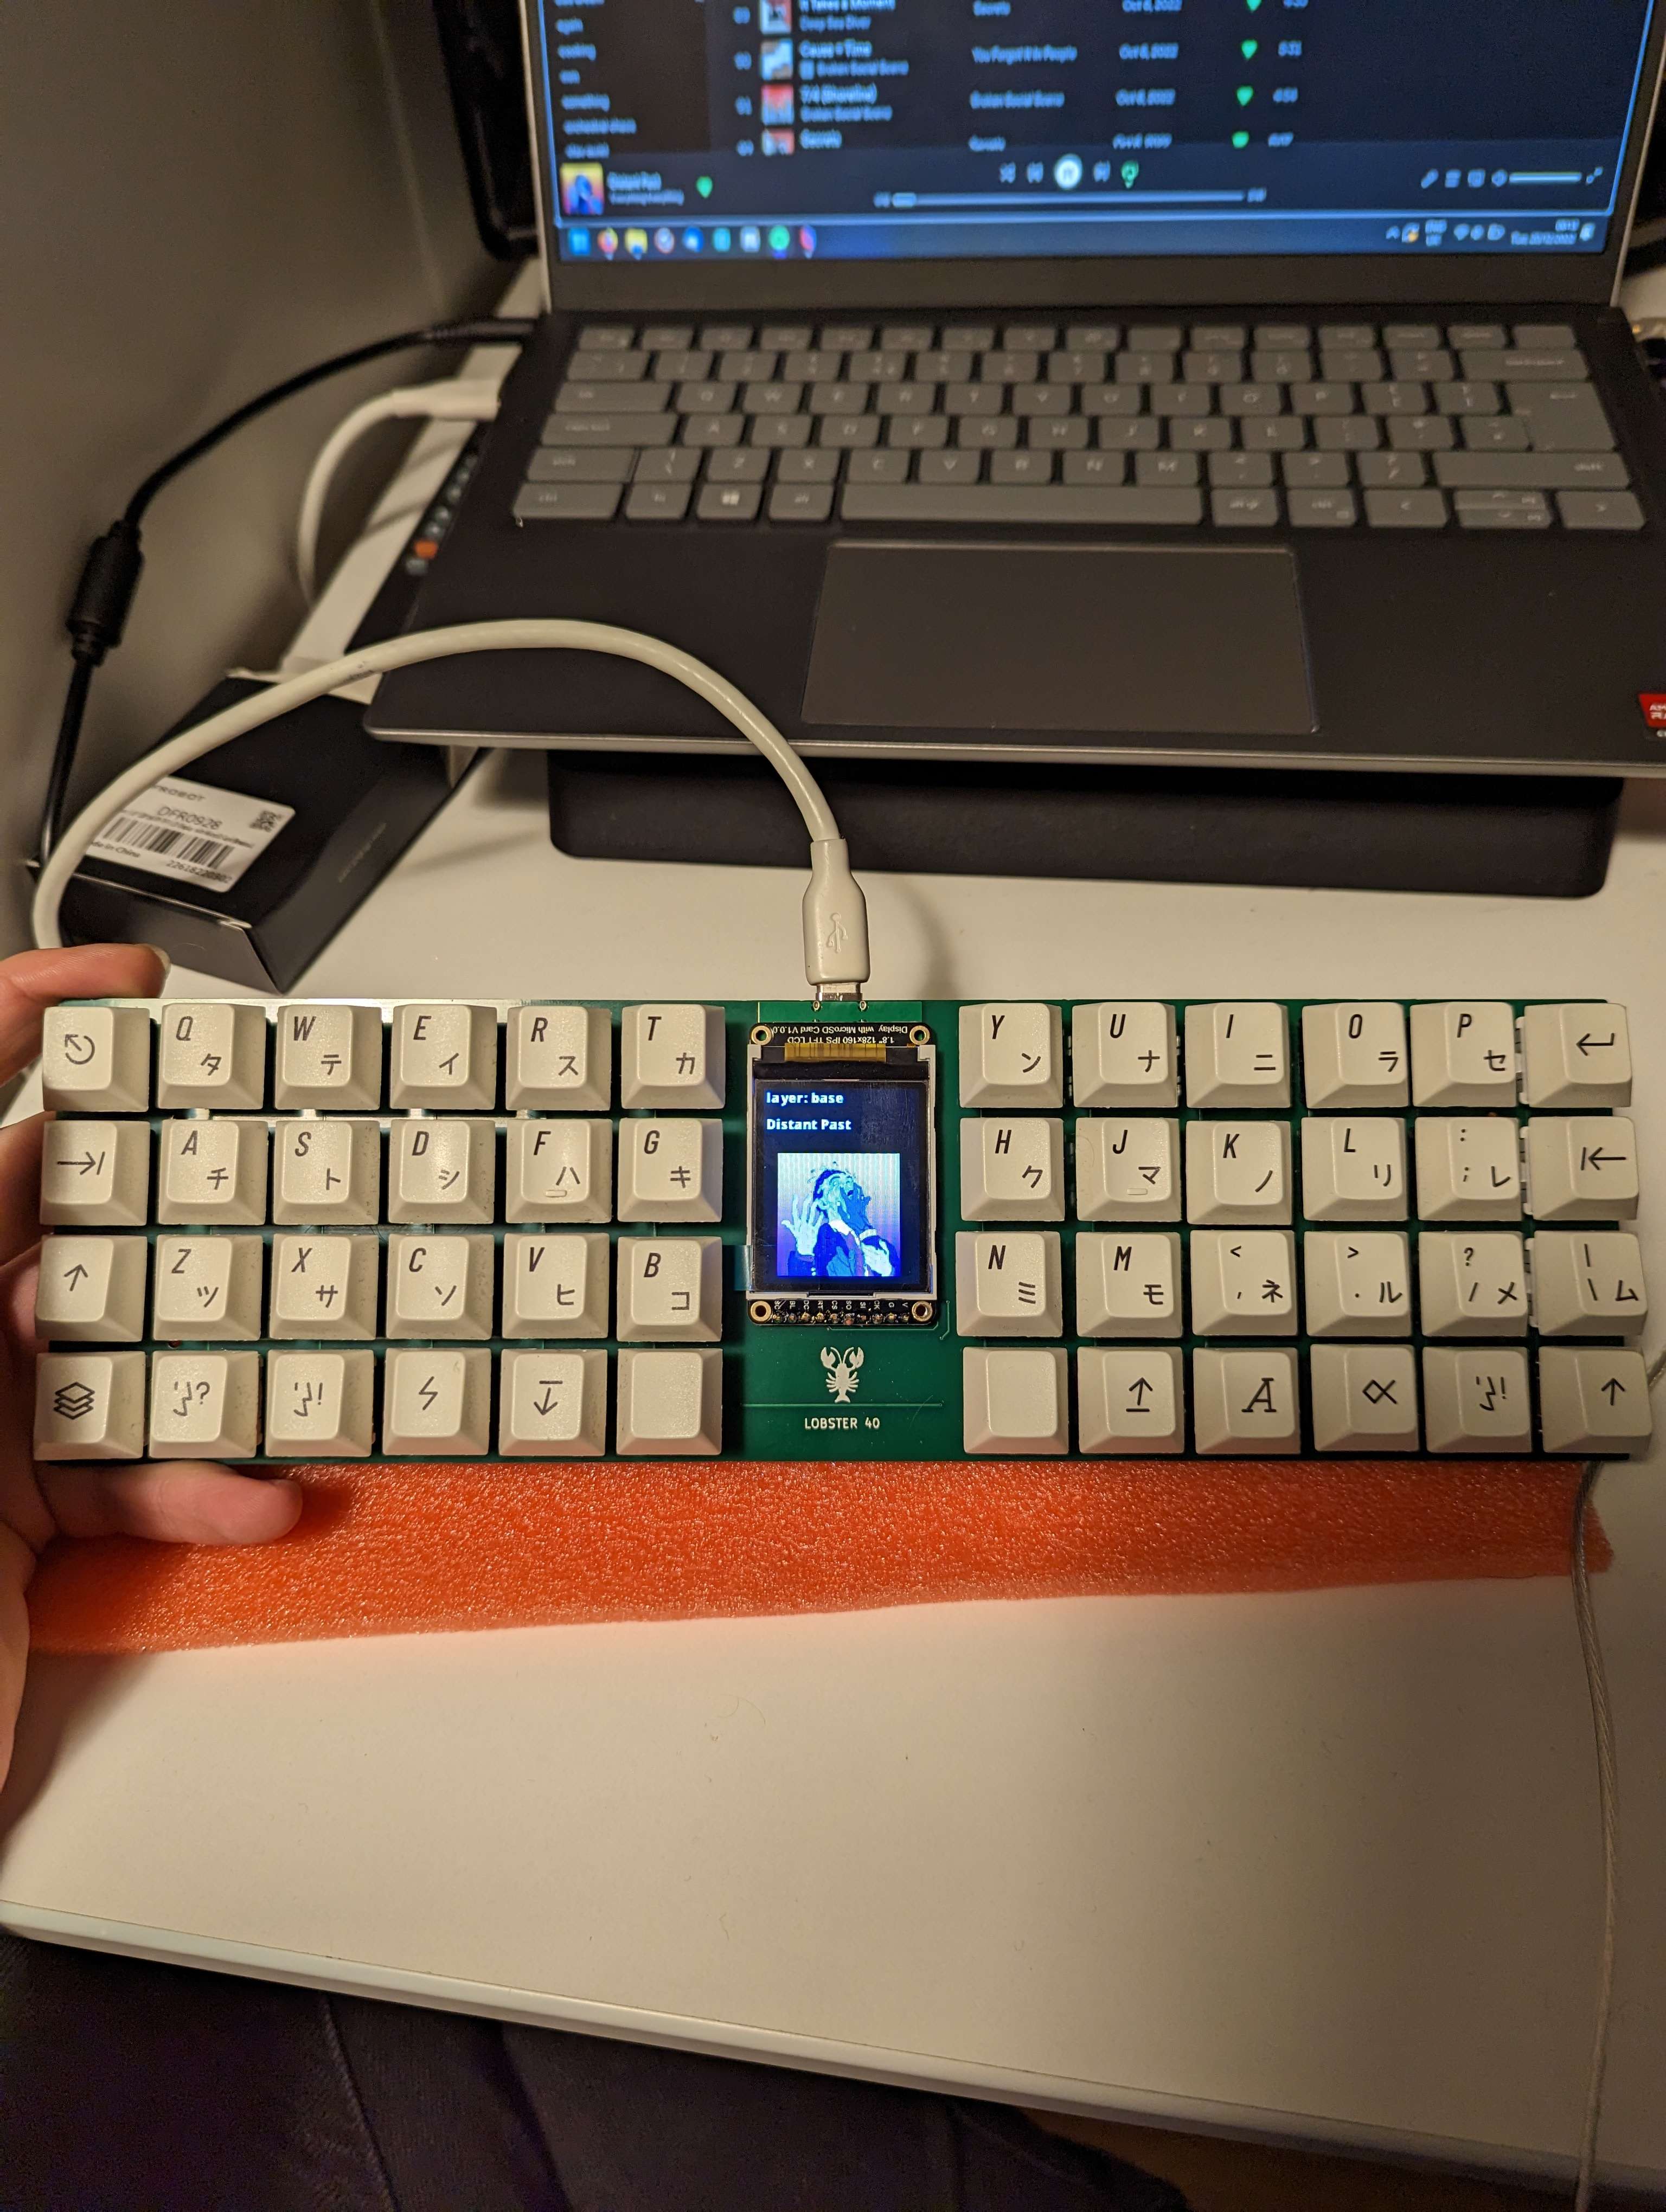
As I mentioned previously I loved the idea of a screen on a keyboard. Having some spare money, I ordered a display and started experimenting with it, using a Pico and some QMK code (thanks to tzarc for the fantastic tool that is QP!) - I was able to get a start on adding the display. (this also allowed development of Lobster Control to start). Once I had firmware working and could confirm this display was compatible with QMK, I decided to add it to the PCB! Which wasn't too hard but the lack of footprint made it hard for a kicad noob like myself to add it to the project. This is where things went wrong...
I measured out the display size and was able to make a mostly accurate footprint and sent it off to JLCPCB. BUT I missed one thing, the headers were the wrong size and I didn't notice this till after the PCB had been shipped, which was far too late to get it amended. Safe to say I was quite upset, but I quickly fixed the problem by using an already available footprint for a similar display (although the length is wrong, but it's not important for my use case). This was quite demotivating nonetheless I continued to use the keyboard and put the project on-hold until I had some money spare to order more
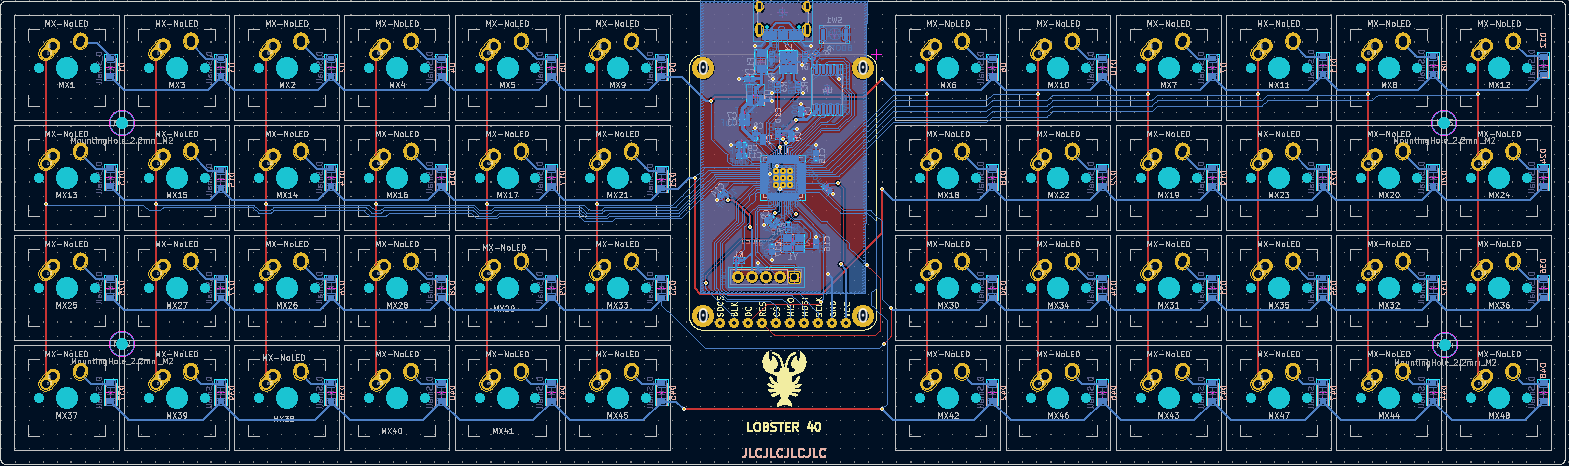
After a couple of months, I was fortunate enough to have some spare funds to order another set of PCBs - I added a lobster logo to the silkscreen and sent off the new design over to get made. I've attached an image of the Revision 2 PCB for those that are curious.
If you're interested in Electronics and Keyboards, I would highly recommend that you have a go at designing your own keyboard - doesn't have to be anything too crazy, but working on something which you'll use every day and hold in your hands is quite satisfying, and surprisingly affordable compared to more premium keyboards.
It also allowed me to get out of a multi-month programming burn-out where I was simply unable to find a satisfying enough project to dedicate time too (although the topic of ADHD and perfectionism is for another day...)
A massive thanks to the wonderful contributors to QMK (especially tzarc - who is an actual legend), MBUK Discord Server for having a look at my PCB, and ai03 for a super informative blog/tutorial!